
Traditional Indian Snack Making Techniques: 8 Methods
- DesiMunchiess

- 7 days ago
- 8 min read
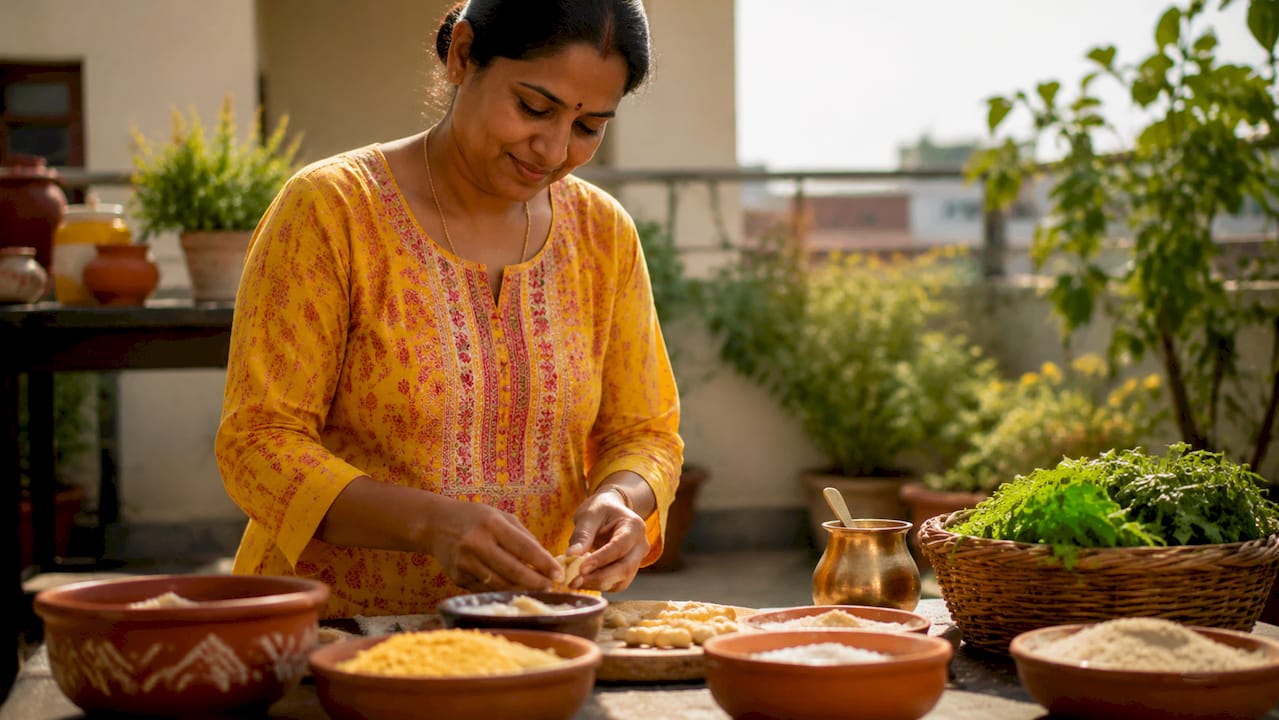
Traditional Indian snack making techniques are a masterclass in texture engineering, combining precise dough handling, controlled frying, soaking, and sun-drying to produce snacks with authentic crunch and bold flavor. These methods, refined across generations in home kitchens from Tamil Nadu to Rajasthan, are not casual cooking steps. They are deliberate craft decisions. Snacks like murukku, mathri, masala vada, papad, and diamond biscuits each demand specific preparation sequences, and understanding those sequences is what separates a genuinely crisp result from a greasy, soft disappointment. This guide breaks down 8 core techniques so you can replicate that authentic quality at home.
1. Traditional Indian snack making techniques start with sieving
Sieving flour blends before mixing dough is the single most overlooked step in home kitchens, yet it directly determines whether your murukku or chakli holds together or bursts in the oil. Sieving removes lumps, aerates the flour, and creates a uniform particle size that produces smooth, consistent dough. For murukku, the standard blend is rice flour and urad dal flour, and both must be sieved together before any liquid is added.
Skipping this step causes uneven hydration. Dense pockets in the dough expand unevenly when they hit hot oil, which causes cracking or bursting. The regional snack variations across India all share this foundational step, even when the flour combinations differ.
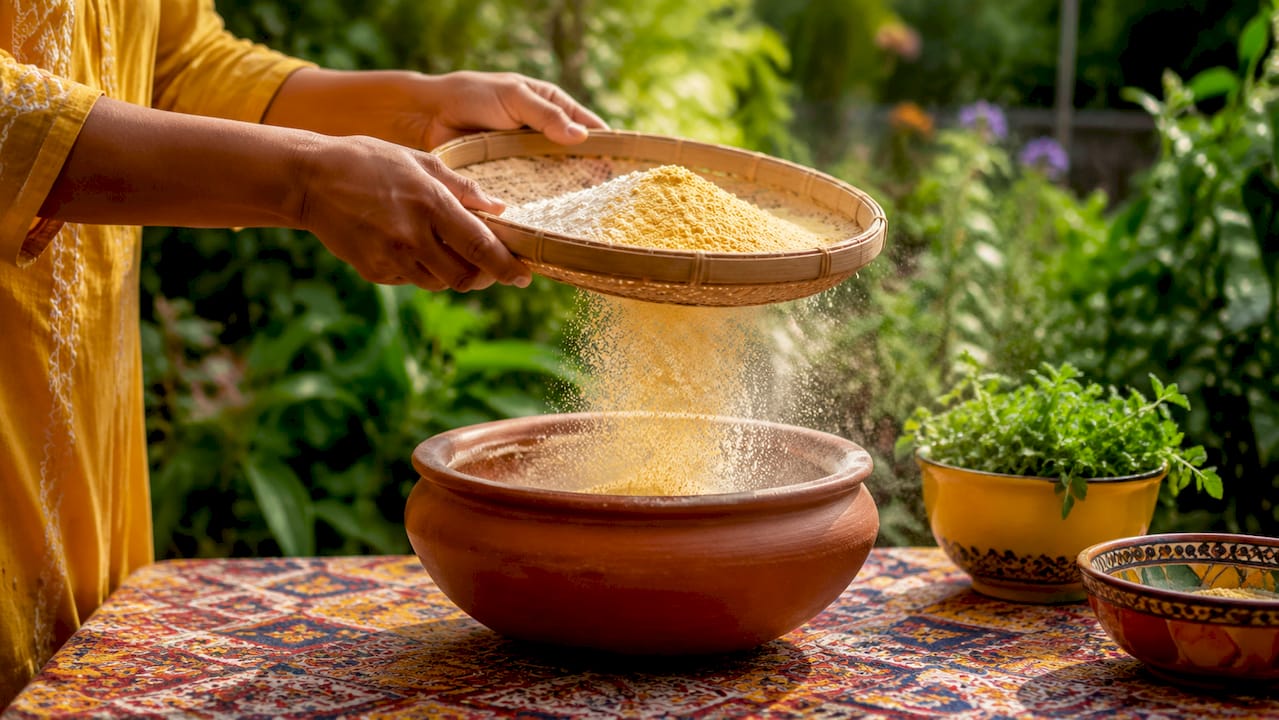
Pro Tip: Sieve your flour blend twice if you are working with stone-ground urad dal flour, which tends to carry more coarse particles than commercially milled versions.
2. Adding fat as a shortening agent for light texture
The choice of fat in dough is not just about flavor. Ghee and butter act as shortening agents, coating flour particles and limiting gluten development. This produces a flakier, lighter texture in the finished snack rather than a dense, chewy one. Ghee versus butter in dough directly affects the snack’s lightness and mouthfeel, reflecting ancestral food science embedded in traditional recipes.
For diamond biscuits and mathri, butter or ghee is rubbed into the flour until the mixture resembles breadcrumbs before any water is added. This technique mirrors Western shortcrust pastry logic but predates it in Indian kitchens by centuries. The fat ratio matters: too little produces a hard, dense bite; too much causes the dough to crumble during shaping.
3. Dough resting for hydration and gluten relaxation
Resting dough for 15 to 30 minutes before shaping is non-negotiable for snacks like mathri and diamond biscuits. During this rest period, water molecules fully hydrate the semolina or flour, and gluten strands relax. The result is dough that rolls evenly, holds cut shapes cleanly, and fries to a uniform golden brown.
Resting semolina dough for 20 to 30 minutes enables pliable dough and better crunch in diamond biscuits, with uniform Maillard browning from medium-hot oil frying. Maillard browning is the chemical reaction that creates that deep golden color and nutty flavor. Without adequate rest, the dough fights back when you roll it, springs unevenly, and produces snacks with pale patches or raw centers.
Cover the dough with a damp cloth during resting to prevent surface drying
Do not refrigerate during the rest period, as cold dough tightens gluten rather than relaxing it
For semolina-based doughs, extend the rest to 30 minutes to allow full grain hydration
4. Soaking and coarse grinding for lentil-based snacks
Masala vada preparation requires soaking dal for at least 2 hours and grinding coarsely while retaining 10 to 15 percent whole dal for the signature nugget texture. This is the defining technique behind South India’s most beloved street snack. The whole and partially crushed dal pieces create pockets of resistance in every bite, giving masala vada its characteristic mouthfeel.
Here is the step-by-step process for authentic results:
Soak chana dal in cold water for 2 to 5 hours, or use warm water for a 45-minute quick soak
Drain completely and spread on a clean cloth to remove surface moisture
Reserve a small handful of whole soaked dal before grinding
Grind the remaining dal coarsely, stopping before it becomes a smooth paste
Fold the reserved whole dal back into the ground mixture
Add coarsely chopped onion, green chili, curry leaves, ginger, and salt
Shape into flat patties and fry at 350°F (175°C) for 4 to 6 minutes until deep golden
Coarsely ground spices and fractured dal pieces preserve complex textures and essential oils, distinguishing high-quality traditional snacks from overly processed versions. Pulverizing the spices destroys those flavor pockets entirely.
Pro Tip: Drain soaked dal on a kitchen towel for at least 10 minutes before grinding. Excess water in the batter causes the vada to absorb oil and lose its crisp exterior within minutes of frying.
For a ready-made version that captures this texture, the masala pakora from Desimunchiess shows exactly what the right batter consistency produces.
5. Controlling oil temperature during frying
Oil temperature is the variable that most home cooks get wrong, and it affects every fried Indian snack. Constant medium heat in oil avoids cracking and uneven crispness, which are the two most common failure points for pressed snacks like murukku and chakli. Oil that is too hot browns the exterior before the interior cooks through. Oil that is too cool causes the snack to absorb fat rather than fry.
The target range for most deep-fried Indian snacks is 325°F to 360°F (163°C to 182°C). A simple test: drop a small piece of dough into the oil. If it sinks and slowly rises, the temperature is right. If it immediately shoots to the surface and browns in under 30 seconds, the oil is too hot. Do not overcrowd the pan. Adding too many pieces at once drops the oil temperature sharply, which leads to greasy results.
6. Keeping shaped dough covered before frying
Covering shaped murukku dough prevents surface drying and separation, maintaining the structural integrity of each piece during pressing and frying. This step is easy to skip when you are working quickly, but surface-dried dough develops micro-cracks that expand in hot oil and cause the snack to break apart.
The practical approach is to press or shape a batch of murukku onto parchment or a greased plate, then cover the batch with a clean, slightly damp cloth while you fry in stages. This keeps the waiting pieces at the right moisture level. The same logic applies to papad discs before sun-drying: cover them loosely to protect from dust without trapping moisture.
7. Sun-drying as a traditional preservation and texture technique
Sun-drying removes moisture and creates lighter, firmer, shelf-stable snack discs like papad, allowing storage for up to a year with proper drying and hygiene. This is not passive food storage. Sun-drying is an active cooking technique that transforms raw dough into a product with a completely different texture profile.
Condition | Requirement |
Temperature | High heat, ideally above 95°F (35°C) |
Humidity | Low, below 50% for effective drying |
Sunlight | Direct, unobstructed for 6 to 8 hours daily |
Duration | 1 to 3 days depending on thickness |
Protection | Covered with fine mesh to block insects and dust |
Salt and spices like black pepper and cumin serve as natural preservatives during the drying process, not just flavor additions. After drying, papad and vathal are roasted or fried before eating, which reactivates the texture and adds the final crunch. Regional variations are significant: Tamil Nadu-style appalam uses urad dal as the base, while Rajasthani papad incorporates moong dal and more aggressive spicing.
Pro Tip: Turn papad discs once every few hours during sun-drying to prevent curling and ensure even moisture loss from both sides.
8. Ingredient choices that define unique Indian snack textures
Specialty flours, specific spices, and traditional fats are not interchangeable in authentic Indian snack recipes. Each ingredient plays a structural role, not just a flavor role. Understanding this is the key to replicating authentic results in a home kitchen.
Ingredient | Textural role |
Rice flour | Creates crispness and lightness in murukku and chakli |
Urad dal flour | Adds binding strength and a slight chew |
Semolina (sooji) | Produces a firm, slightly grainy crunch in mathri |
Ghee | Shortens gluten for flakiness and light mouthfeel |
Ajwain (carom seeds) | Adds texture bursts and aids digestion |
Hing (asafoetida) | Enhances savory depth without adding bulk |
Ajwain deserves special attention. Most home cooks treat it purely as a flavoring spice, but its hard seed structure creates small crunch pockets in mathri and diamond biscuits that contrast with the surrounding dough. Hing, used in tiny quantities, amplifies the savory notes of lentil-based snacks without changing their texture. These are the rare Indian snack ingredients that make the difference between a good snack and an authentic one.
Use stone-ground urad dal flour when possible for better binding in murukku dough
Add ghee at room temperature, not melted, for the shortening effect to work correctly
Coarsely crack ajwain seeds slightly before adding to dough to release their oils
Key takeaways
Mastering traditional Indian snack making techniques requires precise control over dough moisture, fat incorporation, soaking duration, frying temperature, and sun-drying conditions to achieve authentic texture and flavor.
Point | Details |
Sieve before mixing | Always sieve flour blends to prevent bursting and ensure smooth, uniform dough. |
Fat as shortening | Rub ghee or butter into flour before adding water to create light, flaky snack texture. |
Rest the dough | Allow 15 to 30 minutes of rest for full hydration and gluten relaxation before shaping. |
Coarse grind for lentils | Retain 10 to 15 percent whole dal in masala vada batter for authentic mouthfeel. |
Sun-drying is active cooking | Dry papad in direct sunlight for 1 to 3 days, then roast or fry before serving. |
What I have learned from years of watching these snacks get made
The biggest mistake home cooks make is treating these techniques as optional shortcuts rather than load-bearing steps. I have seen perfectly good murukku dough ruined by skipping the sieve, and masala vada that turned greasy because the soaked dal was not drained properly. Each step in traditional Indian snack preparation exists for a specific reason, and that reason is almost always about texture.
The oil temperature issue is the one I see most often. People crank the heat because they want faster results, and they end up with snacks that are dark on the outside and raw in the middle. Medium heat is not a suggestion. It is the technique. The same patience applies to sun-drying papad. Rushing it indoors with a fan is not the same as two days of direct sunlight. The texture simply does not develop the same way.
Cooling fried snacks completely before storing them in an airtight container is another step that gets skipped. Residual steam from warm snacks softens the exterior within hours. Traditional snack-making recognizes storage and crispness retention as part of the technique itself, not an afterthought. Get that right, and your homemade murukku will stay crisp for two weeks.
The cultural joy of making these snacks at home is real. These recipes carry memory and identity. Experimenting with spice ratios or flour blends is encouraged, but respect the core process. The sieve, the rest, the temperature, the drain. Those are not negotiable.
— Shivam
Taste the real thing while you practice
We know that learning these techniques takes time, and sometimes you just want to taste the benchmark before you start cooking. That is exactly why Desimunchiess exists.
At Desimunchiess, we handcraft bold, home-style Indian snacks using the same traditional methods described in this guide. From freshly made murukku to crispy lentil bites, every product is made with quality ingredients and real care. You can use our snacks as a flavor reference while you practice at home, or simply enjoy them as a delicious shortcut on busy days. Pair them with a warm cup of masala chai for the full experience. Shop our range and taste what authentic really means.
FAQ
What flour is best for making murukku at home?
Rice flour and urad dal flour are the standard combination for murukku. Sieving both together before mixing ensures smooth dough and prevents the snack from bursting during frying.
How long should I soak dal for masala vada?
Soak chana dal for a minimum of 2 hours in cold water, or 45 minutes in warm water as a quick alternative. Drain thoroughly before grinding to prevent a greasy batter.
Why does my fried snack turn soft after cooling?
Soft snacks after cooling are almost always caused by storing them before they have fully cooled. Residual steam trapped in an airtight container softens the exterior. Cool completely on a wire rack first, then store airtight.
Can I sun-dry papad indoors?
Outdoor sun-drying in direct sunlight for 1 to 3 days produces the best texture and shelf life. Indoor drying with a fan can work in a pinch but typically results in uneven moisture loss and a less firm disc.
What does ajwain do in mathri dough?
Ajwain seeds add small crunch pockets to the finished snack and aid digestion. Slightly cracking the seeds before adding them to the dough releases their oils and intensifies both flavor and texture.
Recommended
Comments